Rustchic Is Now Urban Cottage Living

One way or another you have landed yourself on my old blog. I am so excited to bring you my new design website, Urban Cottage Living.

My vintage, 920 square foot, Urban Cottage in the Autumn.

The Rustchic (rustic + chic) life is still how I live. Now I'm doing it in a vintage, 920 square foot home.

Home design, DIY projects, gardening, and entertaining are still my passions. At Urban Cottage Living I'm sharing how you can do all of those things in a small house.

Urban Cottage Living is design for living a big life in a small house. Please come stop by and connect.

Urban Cottage Living
Facebook
Instagram
Pinterest

Warmly - Tahni

Asian Slaw

This makes a huge batch! If you are making this for 2 or 3 you may want to cut the recipe in half. I love this served with Thai Chickpea Burgers or seared Ahi.

Asian Slaw

1 medium cabbage, sliced thin
1 medium onion, sliced thin
1 red, yellow, or orange bell pepper, sliced thin
1 cup Ginger Dressing

Combine all of the ingredients together in a large bowl just before serving.

Vegan, Gluten Free, Sugar Free

Spicy Thai Chickpea Burgers

These are soooo good served on top of Asian Slaw and topped with Creamy Vegan Ginger Sauce! To save time, I double or triple the recipe and freeze uncooked burgers.


2 cups cooked chickpeas
1 small onion
2 cloves garlic
2 teaspoons fresh ginger, grated
1/4 cup fresh cilantro
1/2 cup garbanzo bean flour
1 tablespoon lime juice
1 teaspoon sea salt
1 drizzle extra virgin olive oil
Sriracha hot chili sauce to taste

2 tablespoons extra virgin olive oil (for cooking.)

Place all of the ingredients in a food processor and pulse until combined stopping to scrape down the sides. Use the palm of your hand to make four burger patties.

In a large nonstick skillet, cook over medium-high heat until lightly golden flipping once. These also cook fantastic in a panini press on medium-high heat. Cook until lightly golden.

Vegan, Gluten Free, Sugar Free

Creamy Vegan Ginger Sauce

You will be surprised this is vegan because it is so creamy. I love it on top of Thai Chickpea Burgers, in Lettuce Wraps or as a veggie dip.


Creamy Ginger Sauce

1 cup Ginger Dressing
1 cup chickpeas, drained and rinsed

Blend in a blender or food processor for 2 minutes or until creamy smooth.

Vegan, Gluten Free, Sugar Free


Ginger Dressing

This dressing is fantastic on salad, veggie meatballs, seared Ahi, and sushi! I use it in my Asian Slaw and as my base in Creamy Ginger Sauce.


Ginger Dressing

1/3 cup rice vinegar
3 tablespoons gluten free soy sauce
2 tablespoons agave nectar
2 teaspoons ginger root, grated
1 clove garlic, pressed
1 teaspoon sesame seeds (optional)
1/2 teaspoon toasted sesame oil
1/4 cup olive oil

Whisk together at least 30 minutes before using to let all those great flavors mix together.

Vegan, Gluten Free, Sugar Free

Smashed Cauliflower

This is a great alternative to mashed potatoes and lower in carbs! Yum.

1 head of cauliflower
2 tablespoons Earth Balance spread
water reserved from steaming
2 teaspoons sea salt
1 teaspoon cracked pepper

Remove the leaves and thicker portion of the cauliflower trunk. Cut the remaining into 1 to 2-inch Pieces. Steam over boiling water for 12 minutes or until very tender with a fork.

Transfer cauliflower to a large bowl or mixer. Add spread, 1/4 cup of liquid from steaming, salt, and pepper. Smash with a potato masher or blend on medium speed in the mixer until smooth.

Vegan, Gluten Free, Sugar Free


Chimichurri Tacos

Traditionally Chimichurri is a sauce used for grilled meat originally from Argentina. Here is a fresh spin on it used in vegan tacos!


Chimichurri Sauce
1 cup fresh cilantro
1/2 cup fresh Italian parsley
1/2 cup extra virgin olive oil
1/4 cup lime juice
2 cloves garlic
2 tablespoons agave
1 teaspoon sea salt
1/2 teaspoon ground cumin
1/2 teaspoon ground pepper

Blend all ingredients in a food processor or blender. I like to make this sauce a couple of hours before to allow the flavors to marry. You can make it up to a day before.

Taco Filling
8 ounces baby portabella mushrooms, sliced
3 cups cooked black beans, rinsed and drained
2 tablespoons extra virgin olive oil for cooking
1/2 teaspoon salt

In a large skillet over medium heat, add olive oil and sliced mushrooms. Saute' mushrooms until they begin to release their juices and then sprinkle with salt and continue to saute' until lightly browned. Add black beans and half of the Chimichurri sauce.

Toppings
2 cups lettuce, shredded
1 cup red onion, thinly sliced
1 Roma tomato, cut in half length wise then sliced thin
1 avocado, thinly sliced
1/2 of the Chimichurri sauce as a drizzle

Serve with warm corn or flour tortillas.

Vegan, Gluten Free

Tip: I like to slice my mushrooms using an egg slicer. It goes really fast and all of the mushroom slices are the same size!

French Onion and Mushroom Soup

I make this one vegan and gluten free. It is really hard to just have one bowl!


Soup Base
2 tablespoons Earth Balance spread
8 ounces baby portabella mushrooms, thinly sliced
3 medium or 2 large onions, thinly sliced
2 cloves garlic, pressed
5 cups water
3/4 cup dry red wine
2 tablespoons Better than Bullion no chicken chicken bullion
1 tablespoon lemon juice
2 teaspoons finely chopped thyme, or rosemary
1 teaspoon sea salt
1 teaspoon cracked pepper
1 bay leaf

Croutons
1 gluten free french baguette
3 tablespoons extra virgin olive oil
2 cloves garlic, pressed

Topping
1 1/2 cups shredded vegan Daiya mozzarella style cheese

Dissolve bullion in 5 cups warm water and set aside to make broth.

In a 6-quart pot or larger over medium-high heat add butter and saute mushrooms until lightly brown. Add onions and garlic and saute for 8 minutes.  Add broth, red wine, salt, pepper, lemon juice, thyme, and bay leaf. Simmer with lid off on low-medium for 20 minutes until onions are tender.

Turn broiler on high setting.

While soup is simmering, make the croutons by cutting the french baguette into half-inch chunks. Place the bread chunks in a microwave safe glass or stoneware 9 x 13 pan. Drizzle with extra virgin olive oil, press garlic and sprinkle on salt and pepper. Toss until completely coated. Microwave on high for 3-4 minutes. Toss again and return to the microwave for another 3-4 minutes. They should be crispy but not burnt.

Place heat-tolerant ramekins, cocottes, or mugs on a cookie then ladle soup into serving container leaving about 1/2 inch at the top. On the top of each serving place enough croutons to cover. Sprinkle approximately 1/4 cup of vegan cheese over the top of the croutons.

Place the cookie sheet in the oven and broil for 2 minutes or until the cheese is bubbling and beginning to turn brown.

Vegan, Gluten Free, Sugar Free


Lentil No Meat Meatloaf

Down home comfort food vegetarian style!


3 cups cooked lentils
3 cups cooked brown rice
3 cups gluten free old fashioned oats
2 large chopped onions
1 large or 2 medium chopped carrots
1 bunch of celery chopped
5 cloves chopped garlic
2 tablespoons extra virgin olive oil
1/4 cup chopped fresh basil
1/4 cup chopped fresh parsley
1/4 cup gluten free soy sauce
3 eggs
2 6 oz can tomato paste

On medium-high heat in a large skillet with olive oil saute onions, carrots, and celery until tender. Add herbs and garlic and saute for one minute. Add soy sauce, cooked lentils, oats, and cooked brown rice and stir until blended. Add eggs and mix thoroughly.

Grease two loaf pans with extra virgin olive oil. Divide recipe in half and pack each loaf pan. Bake at 350 for one hour.

Flip loafs out onto baking sheet and frost one can of tomato paste on each loaf. Return to the oven for 10 minutes.

Tip: If you want to eat one and freeze one, I recommend lining one loaf pan with parchment paper and freeze the loaf over night. Pop out of the loaf pan and store in a freezer safe container. Thaw to refrigerator temperature before baking.

Vegetarian, Dairy Free, Gluten Free, Sugar Free

Creamy Avocado Spread

Some people, like my husband, find eating vegan easier when they can smear their meal with something creamy. He says it helps him not miss cheese so much. This spread is awesome with tacos, falafel, or even just as a dip!


1/2 cup chickpeas, rinsed and drained
1 avocado, pitted and peeled
1/2 cup packed fresh Italian parsley
1/2 cup extra virgin olive oil
1 clove garlic
1 tablespoon lemon juice
1 teaspoon sea salt
dash or 2 of hot sauce (to your own taste)

Combine all of the ingredients in a food processor or blender until smooth.

Vegan, Dairy Free, Gluten Free, Sugar Free


Gluten Free Vegan Macaroni and Cheese

12 ounces gluten-free macaroni or penne - I use Bionaturae
1 tablespoon sea salt - for cooking

1/4 cup vegan margarine - I use Soy-Free Earth Balance
1/3 cup all-purpose gluten-free flour
3 cups almond or rice milk
1/2 cup nutritional yeast flakes
2 tablespoons organic tomato paste - I use Kirkland from Costco
2 teaspoons sea salt
1 teaspoon garlic powder
1 tablespoon lemon juice

Topping
1/2 cup gluten-free bread crumbs - I freeze my gf bread heels and use them for crumbs
1/4 cup melted vegan margarine

Preheat oven to 350 degrees. Grease a 9 x 13-inch pan with extra virgin olive oil.

Cook macaroni or penne according to the package directions in 1 tablespoon sea salt. Drain but do not rinse and return to pot.

In a saucepan, make a roux by whisking the margarine and flour on medium heat until it forms a paste. Add almond or rice milk, nutritional yeast, tomato paste, salt, and garlic powder. Bring to a low boil whisking frequently then reduce to low heat until it thickens then whisk in lemon juice. Stir until combined.

Once the pasta is cooked pour sauce over the pasta and toss well. Move the pasta into the 9 x 13 pan.  Sprinkle with bread crumbs and drizzle with margarine. Bake for 30 minutes. Allow to cool for 5-10 minutes before serving.


Organic Ketchup


My quest to eat organic and less processed food continues into the ketchup bottle.

3 6 oz cans Organic Tomato Paste (I use Kirkland brand)
2 1/2 cups Water
1/2 cup Organic Agave
1/4 cup Organic Apple Cider Vinegar
1/4 cup White Wine Vinegar
1 tablespoon Organic Molasses
1 tablespoon Garlic Powder
1 tablespoon Onion Powder
1 tablespoon Salt
1/2 teaspoon All Spice

In a saucepan bring to a low rolling boil. Simmer for 15 minutes. Cool and transfer into bottles. Note: Though I prefer to store food in glass, my leftover agave bottles work perfect and allow for the "squeeze factor."

Vintage Typewriter Desk

This little guy caught the corner of my eye hidden down an isle of old cabinets, cold and lonely. I picked him right up and gave him some well deserved attention.

Once home a little tender loving care was given with a light sanding, a coat of primer, and a coat of Rustoleum Midnight Blue. You will be happy to know that he was quickly adopted by an admiring family off my local facebook resale group.

Coffee Filter Lampshade & More


I have yet to make a lampshade out of coffee filters but it is on my long to-do list!


Sarah over at Northwest Hospitality has directions on how you can make this pretty lamp.


If you really need detailed directions, then Ashely at Little Miss Momma has got you covered.

A couple years ago I did a post on my other blog on 13 uses for coffee filters. I thought it would be fun to share them with you here and add another use--lampshade--to the top of the list.

- Make a lampshade.

- Cover food when cooking in the microwave to prevent splatters.

- Use for lint-free cleaning on windows, mirrors and chrome.

- Place between ceramic dishes and glass bowls when traveling in your RV to eliminate
  clicking in the cupboard.

- Filter wine from a broken cork.

- Prevent cast-iron from rusting by placing a filter in the skillet to absorb moisture.

- Reuse frying oil by straining used oil through a coffee filter lined sieve.

- Line a plant pot to prevent soil from going out the drainage hole.

- Poke a hole in the bottom for your Popsicle and eliminate drips on your shirt.

- Soak up extra oil from fried foods such as bacon and french fries.

- Fill with a scoop of baking soda. Twist closed with a rubber band and tuck into stinky
  shoes or closet to absorb odors.

- Fill with fresh herbs and tie to be used in soups and stews.

- Rest your spoon on one the next time you make a gourmet sauce.

- Use as a disposable snack bowl for popcorn and chips.

- Make coffee! 

Did I miss anything? Leave me a comment.


Turquoise Cabinet


This old cabinet door caught my eye and I just knew it had something special!


The edges and bumps got a good sanding and the entire piece was cleaned top to bottom.


The legs were removed from an old coffee table and painted black before being securely screwed to the bottom. A small piece of crown trim painted black was added to the top.


Decoupage black and white paper enhances the inside.


These cute black and white porcelain knobs finish it off.


I think this would be perfect for extra bathroom, laundry, or nursery storage!


Repurposed Side Table - Lack Hack


I named this post "Lack Hack" because that is exactly what it is. This is an Ikea Lack side table that I've hacked the legs off of to be used as a serving area. One of the best catering or tablescape tricks is to tier your food. It gives it such great dimension, flow and just looks appetizing.

Most of the time when I put out the spread it's much bigger than this, but we had a few friends over for New Year's Eve and I didn't want a big hoop-di-doo.  However, I wanted our snacks to feel festive--it's important to me that my friends feel special. I literally cut the legs in half 45 minutes before they arrived!


Next trip to Ikea, I'm picking up two or three of these in black and cutting them different heights to use on my formal dining room table for the next big party!

Mid-Century Dining Chairs


These chairs are so much fun! I picked them up at one of my favorite thrift shops and knew right away they should be whimsical. I decided to choose the color based off the fabric, so I chose that first.


This project was fairly easy with a little bit of sewing involved. The seat and backs were removed and cleaned. I added a little bit of batting to the seats before stapling on the new fabric. Simple slipcovers were sewn for the backs. After a good sanding and priming, the bases got a nice coat of RustOleum Fern and then everything was put back together.


I really like the old metal hardware on the legs of the chairs and wanted to keep a little bit of it's original flair.

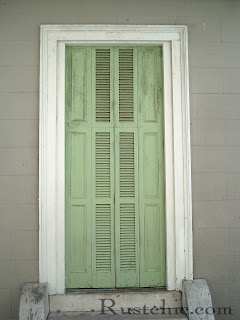
Vintage Doors of New Orleans


I came across these door photos I took walking around New Orleans last year and had to share them with you. They are just beautiful to me. Inspiration is everywhere. These doors have inspired me to want to start taking more architectural pictures right here in my own town!

I've got a camera on my phone, but this year I'm challenging myself to keep one of my smaller cameras with me wherever I go. You never know where the next idea may come from!


Table Setting Burlap & Glass


You know me. I love the rustic and the chic mixed together! Sticking with classic neutrals for a holiday dinner party, I mixed the organic texture of burlap with my formal china. Simple and elegant.

The burlap runner was easy to make. Since my table can extend over 8 feet long, I purchased 3 yards of burlap from the fabric store and then cut it in half length wise. I then cut the selvage off the other side. (The selvage is the narrow border on the edge of fabric to keep it from raveling.)

Grab a piece of strand from one edge of the burlap then pull it all the way out. Repeat until you get the width of fray you like. Mine is about 2 inches. The more bold, the better in my opinion. Do this on both sides and on the ends.


DIY Lamppost


Have you asked "what can I do with my old brass chandelier?" I've been having lots of fun making and selling what I like to call my chandelabra for candles. I just had to try an electric version.

I adore the storybook look of a lamppost and thought one would look quaint on my front porch. Not only does it evoke a sense of wonder as you walk up to my front door, but it looks just as charming from the inside looking out.

Always experimenting, I wired together an old floor lamp and an old brass chandelier then sprayed it black. My husband has already claimed this one for his study!


Gingerbread House


Today was gingerbread house decorating day--a Christmas tradition in our home for over 22 years now. This year four of us decorated one gingerbread house. Originally the two girls in the house--myself and my youngest daughter--were going to share it. But today it turned into a project of four with dad and brother pitching in. We all got one side of the house.

Each side of the house depicts our personalities and our creativity. I found it intriguing as artists we are such perfectionists and our own worst critic. Each side of the house turned out great! But each one of us found something we didn't like in our creation, and something we liked better on another.

Like most things in life, we can use these feelings of inadequacy in one of two ways. We can become competitive and try to out-do the next person or we can appreciate the other person's creation and encourage them.

This made good food for thought. Yes, pun intended. Having been raised in a sports-driven house, it has been ingrained in me to be competitive. To try hard and to be better than others. For me, this transferred into a successful career in sales. But I have to ask myself is it healthy to be competitive as an artist?

As artists, designers, musicians, architects we should believe in our passion and stand by our art form. Should we strive to the best we can? Yes, of course! However, I also think that appreciating another person's talent as an artist should be celebrated and we should encourage each other, not try to be the winner.


Stocking Mantel Topper


As my family grows with children marrying and grand-babies being born, so does my stocking collection! We have simply outgrown my "peace" and snowflake hooks that once sat atop the mantel. This year I had to create something new and with a little planning for future stockings.

I call it a stocking mantel topper. It is basically a custom shelf that fits directly over the top of my mantel and looks like it is the mantel!


Let's back up. This is what my mantel looks like without the stocking mantel topper. So now you can see, it does look a little different and by looking at the first picture you can now see the topper.


The construction was pretty simple and I was able to put it together and get it painted in one afternoon. Here is how it's done.

1 large pine board (I used a 1x12 8 feet long with the length then cut to size)
2 1x3 pine boards for the front and sides
Wood trim (I found mine at an architectural salvage place for $.25 per foot)
Vintage drawer knobs

Basically you are going to construct a three-sided box the size of your mantel. Be sure to glue and nail to hold everything securely into to place then attach the trim.

Measure the spacing for the number of knobs you need and drill your holes before painting. 

Putty any nail holes and joints where two boards meet. Allow to dry, lightly sand, and tack (or wipe off) any dust. Apply a coat of primer, allow to dry, and then apply a coat of paint.

Once everything is dry, install the drawer knobs as the stocking hooks. You'll notice mine are all mismatched. Some of them were salvaged from the architectural store, some were in my basement, and some where new from Hobby Lobby--which I scored with a half off sale!

Tip: Cut the main top board about 1 inch longer than your mantel so it will easily fit on top of your mantel without being too snug.


Related Posts Plugin for WordPress, Blogger...